Quick Start
Set up your branding in under 5 minutes.
Step 1 — Open Theme Settings
After installation, open Theme Settings:
- Press
Ctrl+Kand type Theme Settings, then pressEnter - Or find it in the sidebar under your module list
Step 2 — Fill In Your Branding
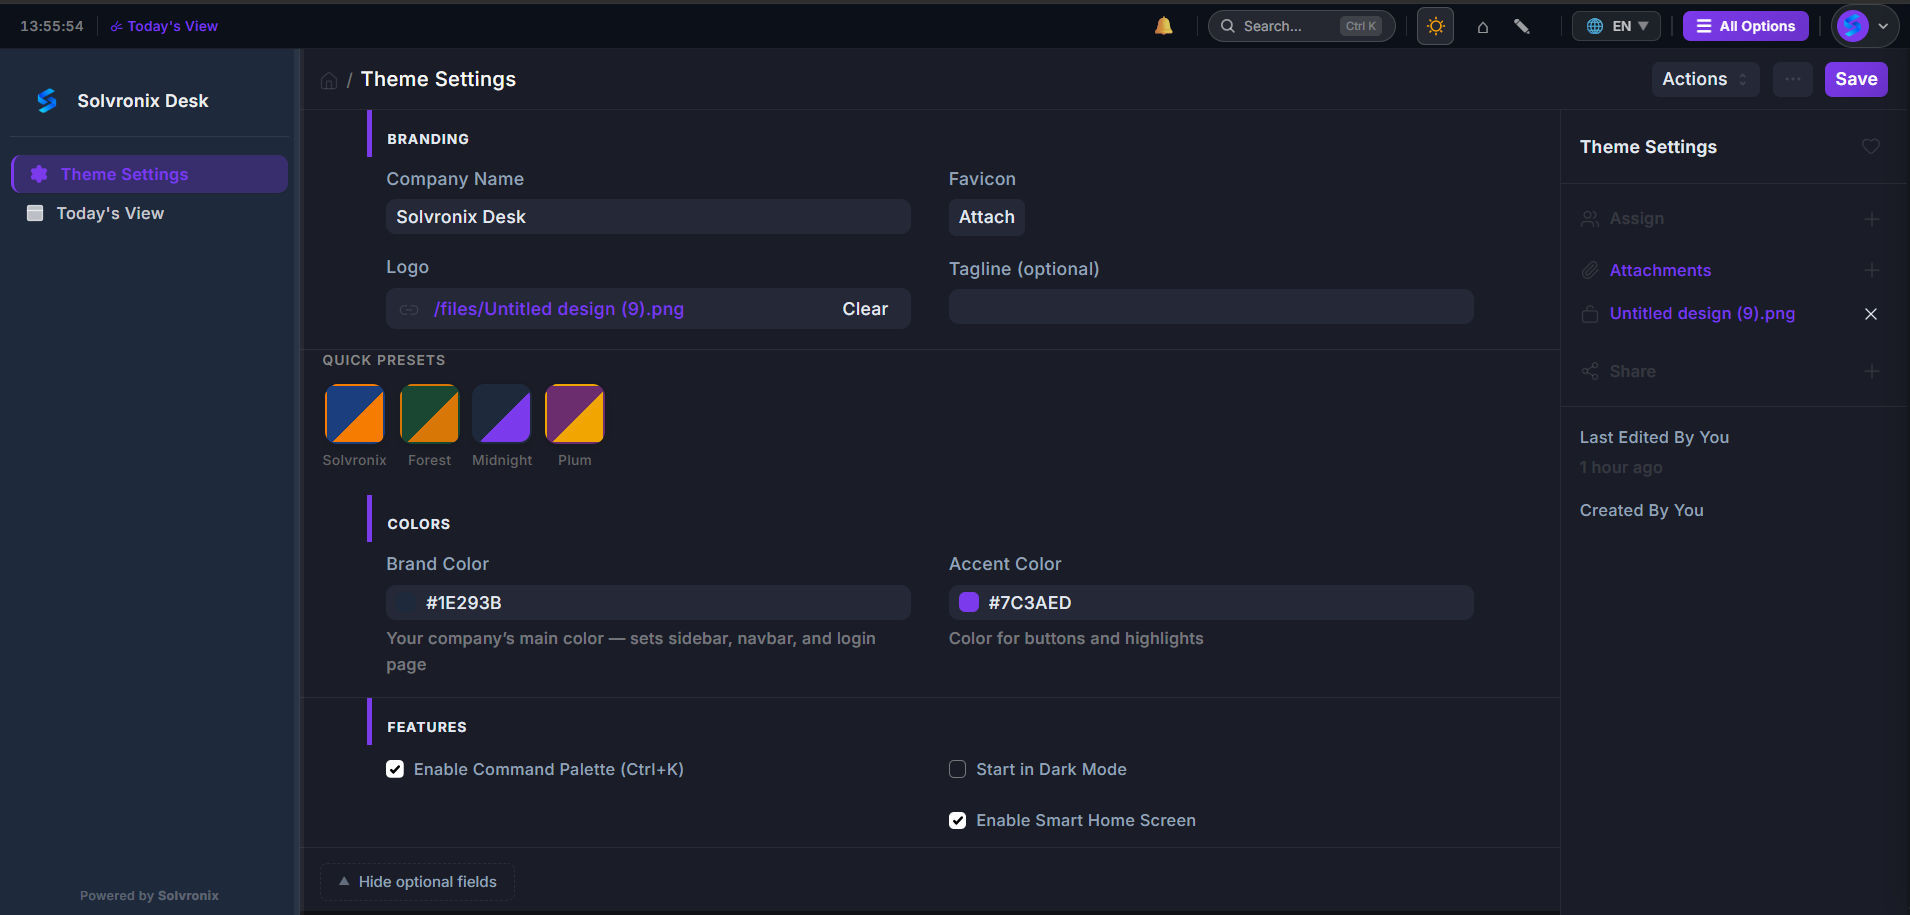
| Field | What It Does |
|---|---|
| Company Name | Shown in the navbar — replaces the default "ERPNext" label |
| Company Logo | Shown in the navbar and on the login page |
| Favicon | Browser tab icon |
| Tagline | Optional subtitle shown under your logo |
| Brand Color | Sets sidebar, navbar, and login page background color |
| Accent Color | Sets buttons, active sidebar item, and highlights |
Tip: Use the Quick Presets row above the color pickers to apply a complete color pair in one click. Click any swatch — both Brand Color and Accent Color update instantly. Available presets: Solvronix, Forest, Midnight, and Plum.
Step 3 — Enable Features
In the Features section of Theme Settings:
| Toggle | What It Does |
|---|---|
| Enable Command Palette (Ctrl+K) | Turns on the keyboard-driven launcher |
| Start in Dark Mode | Opens the desk in dark mode by default |
| Enable Smart Home Screen | Replaces the default home with Today's View |
Step 4 — Save
Click Save. The entire system — sidebar, navbar, login page, buttons — updates instantly with your brand.
What Changes After Save
| Element | Before | After |
|---|---|---|
| Navbar | ERPNext default | Your company name and logo |
| Sidebar | Wide default menu | Slim 64px icon rail in your brand color |
| Login page | Default Frappe login | Full-screen branded login |
| Buttons | Default blue | Your accent color |
| Home screen | Module list | Today's View with KPIs |